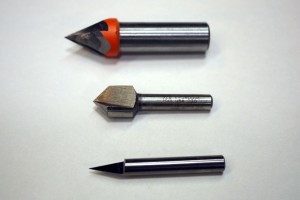
I was recently asked to create a pair of commemorative plaques. Essentially something like a diploma or other certificate, except these were to be carved into wood. No problem, right? I had carved plenty of signs before.
Well, the difference here was the scale of the lettering and the detail of the carving. I decided it was time to step up to some proper engraving bits.

I had been using standard v-bits for all of my sign making up to this point with no complaints. Here’s the problem, when you are carving at very shallow depths, like say 1/32 deep, the tip of a standard v-bit does a pretty bad job. The closer you get to the tip, the less cutting you are able to do because the bit is nearly stationary. Think about spinning a thumbtack on it’s tip. The flutes on the bit are so close together and shallow that you end up denting the wood instead of cutting it.
Here’s where engraving bits come into play. The tip of an engraving bit is not directly in the center of the bit. It is offset by a specific amount depending on the bit you buy. This offset allows the bit to do a much better job cutting at shallow depths. The result is more legible lettering and better detail on very small details.
There are several different angles, offsets, and tip geometries you can choose from. I picked up a set so I could try a few different configurations.

Try out the Amana Tools In-Groove bits. They allow you to replace dull blades on a single shank saving you lots of money.
